Setting up your cab ride in
RAILSIM� Australian Version
First of all, you launch the application - it runs in DOS. In some instances of Windows95 and Windows98, it will not run even if you reboot from the shut-down menu into DOS, requiring you completely reboot the computer (warm boot, or cold boot), and at the appropriate moment in the boot process you hit F8 to display a menu which allows you to select running DOS.
A colleague of mine tells me that Windows Millenium has no DOS facilities at all, so if you are considering upgrading to Millenium, please bear that in mind.
However, the program runs very well in MS-DOS 6.22, and IBM's PC-DOS version 7, these two being the last seperately sold DOS systems available. I also run it in Windows95 and Windows98 (it was in 98's DOS that I made the screen captures.
Of course, all of the the screen captures taken were full screen EGA 640x350 resolution, because that is the resolution a full screen DOS session runs in on anybody's machine. These captures have been enlarged vertically to suit VGA/SVGA/XVGA screens in OS/2, Windows, and X-Windows, and they are actually adjusted to 640x430 pixels (rather than 640x480) to get correctly shaped circular instrument gauges.
A warning... DOS screens, with their black background and white text, are very diffiult to reproduce in miniature, so the thumbnail images below will be unreadable. Don't worry, a solution has been provided (grin!)
These pages are designed to be read in a window up to and including 800x600 pixels in size (no larger). They will display very well at a lower resolution such as 640x480. The gif images are created at 256 colours, and the thumbnails (being jpgs) have a 24-bit (16 million colours) resolution.
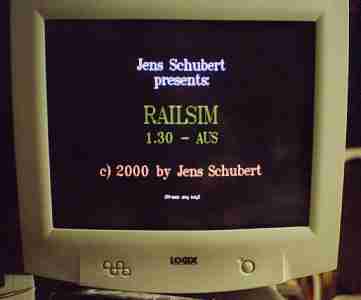
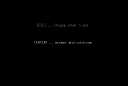
This is the opening screen which gives credit to the application and its author. Click on it, and a large image will open in a seperate browser window.
I have installed two identical copies of the program, one with Australian track files, and the other with US/Canadian ones, to save my own confusion while developing Australian tracks. As you will notice, I have done a minor edit on my opening screen so that I may know which one I am running when it starts!
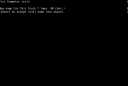
Once the screen has loaded, you can advance to the load route screen by pressing any key. If you ignore it, it will load itself after a number of seconds.
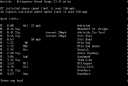
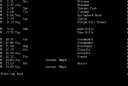
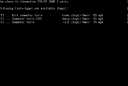
This screen shows the routes into Adelaide ("up" direction). I wanted to run the simulation in the reverse direction, so I hit "Enter" to move to the next track menu.
This is actually the screen we loaded the track from... the reverse direction, from west to east, or "down" as far as Adelaide is concerned.
Green text shows routes constructed - and therefore available for use. Red text is empty storage in the directory, into which new track files can be copied.
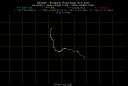
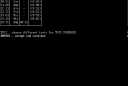
Having selected your route, you are now presented with two screens of topographical information.
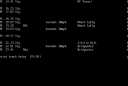
The first one is a gradient profile as shown on the left... this shows our route has a ruling grade of 1 in 40 - or known in international language as 2.25% - both up to Mount Lofty, and down the other side... although we have picked just the first part, from Adelaide to Bridgwater, which used to be the the suburban service terminus on this line, and first outbound stop for country passenger trains (which have not run for years).
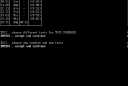
And the following one to its right is a plan (or map) view which shows how this particular route is very full with reverse curves.
RailSim is unable to handle curves as sharp as 10 chain radius (220 yards), but that is actually the degree of tightness to which the early engineers constructed the route. Flange lubricators are located all along the fifty odd miles of the route through to Murray Bridge to reduce rail and wheel wear.
Having looked at your route you have selected, you are then presented with a choice... do you wish to continue? or do you wish to select another route.
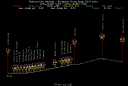
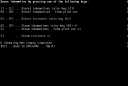
We decided to accept the route, so now we are presented with a series of screens which give us section information, often called "route knowledge".
The first screen starts by refering to ATC (Automatic Train Control) and Cab Signals. This statement is part of the US version of RailSim and is always there on every route the program calls up. Our routes have neither. So we ignore it.
Information on mileage, section name, signals and restriction signs, all appear in the text.
At the end we are asked if we wish to print our route knowledge. As this is displayed in a scrolling fashion to the driver's right hand when driving, the information can be accessed on screen at any time during the simulation. We chose not to print.
Now we are presented with a request to select locomotives. We chose "O" which is self-propelled railcars.
The choice was the Comeng-manufactured 2000-class, purchased when the State of South Australia sold its railway system to the central (Federal) government in the late 1970s. The newly formed State Transport Authority of South Australia no longer had access to building rolling-stock, as it did not own the Islington workshops, which had become part of the Australian National Railways Commission.
Next we are asked how many units we wish to use. We had chosen the basic three-car set (the other choice is a 2-car set), and we went on to pick two such units connected in multiple, making six cars, of which two were powered.
Then we were asked the type of train to run, and "Fast Commuter train" was selected.
This turned out to be a bad choice - because later on we found that it forced the train on to the right hand track after departing from Adelaide (remember this is an American practice simulation that the Australian is based upon)
So we quit the simulation and went through all the above process again, chosing G - commuter train - which worked well on the left-hand track.

Next screen asks us if we wish to chose where the train should stop.
We chose N for No, but if you pick Y for yes, you will then get a screen listing each station in turn with a Y/N decision that needs to be entered.
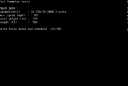
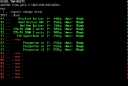
The following screen gives us a specification for the train we are running - details of power units, the train's length and its mass (weight), with a final request to print it, which we refused - again the information is displayed on screen during driving the simulation.
Once you pass here, you are on the "home straight"...
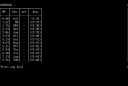
Here we see however many screens are needed by the length of our selected route and its possible stopping points - in our case we had two pages - to display a running schedule of mileposts, stations, arrival times, departure and through times (the latter in brackets), which is all subsequently combined with the route knowledge chart discussed earlier, and displayed to the right of the driver's display when the simulation is running. You are asked to accept and continue, or to select a different train for the chosen route.
When you accept the train and route, the same screen is repeated with a further invitation, this time to choose both a new schedule and a new train rather than continue - there is the ability to change your mind throughout the setting up. Accepting will take you straight into the simulation, where you may have to wait a bit for before departing.
Now, finally, we can take the final step, taking the link below, climbing into the driver's cupola above the passenger compartment into the railcar's cab, settle down at the controls and familairise ourselves with them, and await the guard's "right of way"...
|